Warning: file_get_contents(http://api.bit.ly/shorten?version=2.0.1&longUrl=http%3A%2F%2Fwww.theurbanabo.com%2Fhowto_2.php%3Fhid%3D37&login=studioryu&apiKey=R_8cc15499c28bbcb9125613429a5d9a0c&format=json): failed to open stream: HTTP request failed! HTTP/1.0 410 Gone in /var/www/vhosts/theurbanabo.com/includes/theurbanabo/functions.php on line 17 Warning: file_get_contents(http://api.bit.ly/shorten?version=2.0.1&longUrl=http%3A%2F%2Fwww.theurbanabo.com%2Fhowto_2.php%3Fhid%3D37&login=studioryu&apiKey=R_8cc15499c28bbcb9125613429a5d9a0c&format=json): failed to open stream: HTTP request failed! HTTP/1.0 410 Gone in /var/www/vhosts/theurbanabo.com/includes/theurbanabo/functions.php on line 17 The Urban-Aboriginal | TheUrbanAbo.com ~ Primitive Technology & Aboriginal Living Skills Study & Practice

How to: Make a Melon Basket

Category: Shelter / Difficulty Level: 1
Posted: 2017-02-16 12:35:32
7407 view(s)

Video

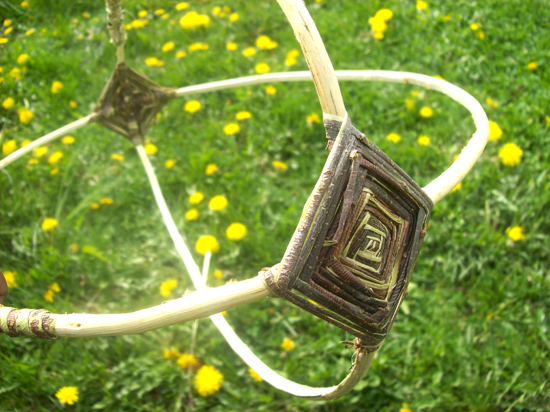
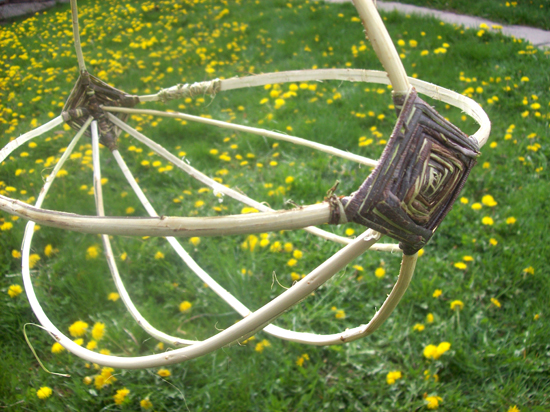
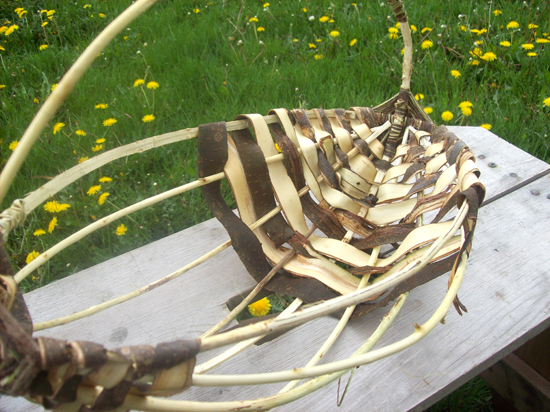
Handwoven ribbed baskets, are also know as the melon basket, buttoks basket, fanny basket, peanut baskt, gizzard basket, bow basket, egg basket and many other regional names. This is the basket with the familior "Ojo de Dios" or God's Eye wrapped pattern on each end of the basket where the handle meets the rim. Wherever you travel in N. America, you'll more than likely see thse ribbed buttoks egg baskets.

Although now found world-wide, hand woven ribbed baskets originated in Europe and were very common in Great Britain. Since many settler in N. America came from the British Isles, ribbed baskets traveled across the Atlantic appearing logically in the Eastern colonies.

Native American vines were used to replace the commonly used willows of England. As creative basket weaving artisans everywhere do, the early settlers experimented with whatever grew in abundance in their area. The ribbed baskets that we think of as traditional styled egg baskets are usually made of split hardwoods, but this style also works well in honeysuckle and other native vines.

Instructions

ABOUTTHEIMG

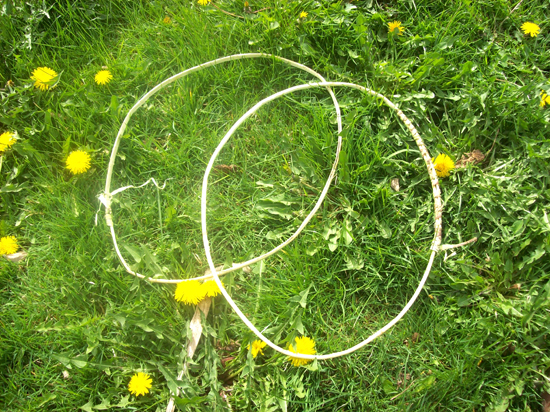
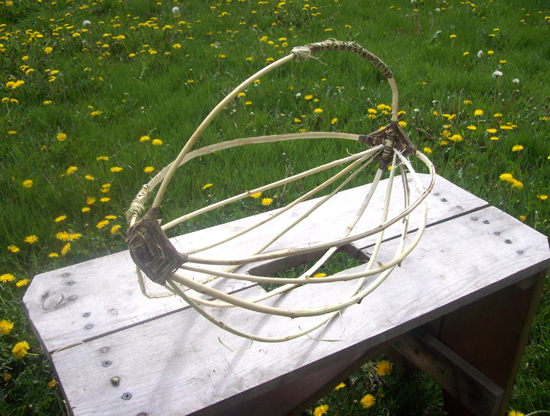
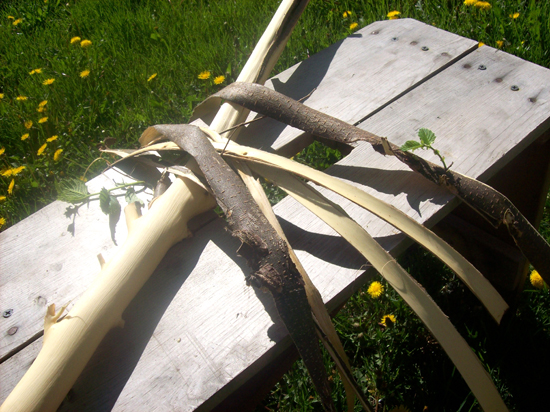
1). Create 2 hoops out of tree saplings. Here I am going to use Elm to create the entire basket. To make the hoops start by scraping away stock from one side of the sapling. So one side is flat and the other side is un-touched. If you are using wild-grape vine this step will not be necessary. Scrape down to the center of the sapling. Notice the shavings. The shaving can be used as tinder for building a fire in a camping situation.

Use light heat to help bend the sapling into a circle from a stove or campfire. Take your time and be careful not to burn yourself. Be gentle in the bending process as the sapling can still break. It is better to do this heat treatment if the sapling is very green and still moist. Look for an even bend all the way around. You may have to scrape/shave off more stock of the sapling in areas that do not bend. Be careful to take of a little at a time. You can always take away, but it is very hard to put it back ;-)

ABOUTTHEIMG

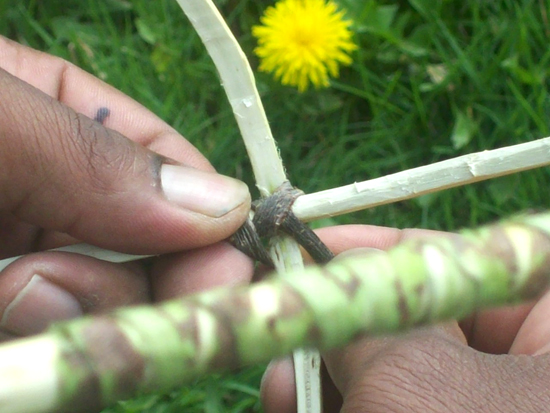
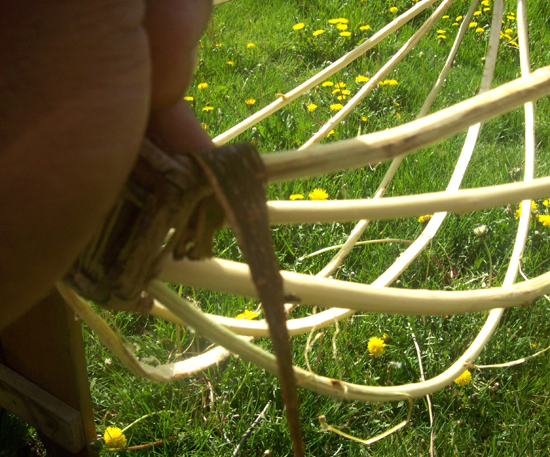
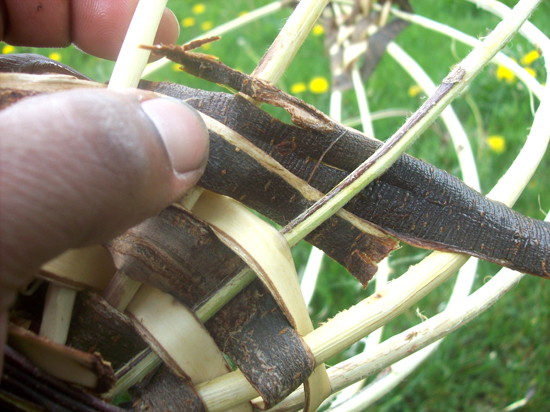
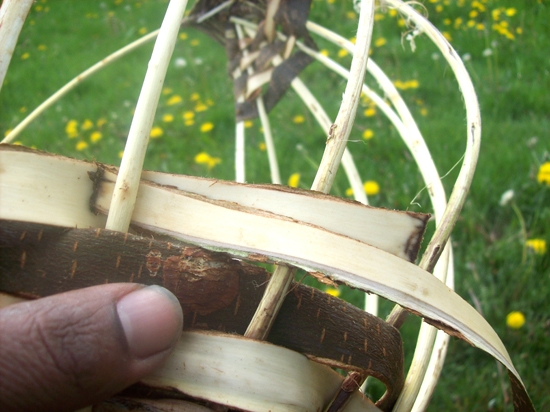
2). Place one hoop inside of the other. Turn them perpendicular to each other. Using strips from the bark of the saplings, start cross-wrapping them together

ABOUTTHEIMG

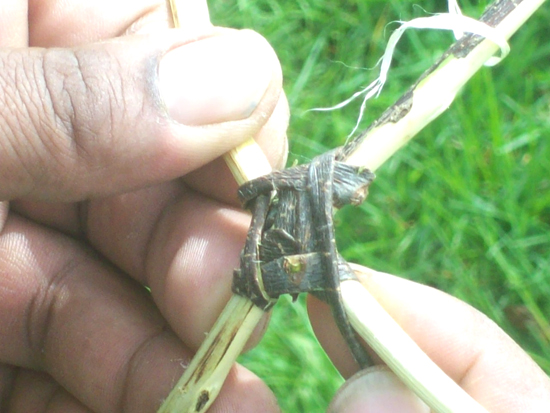
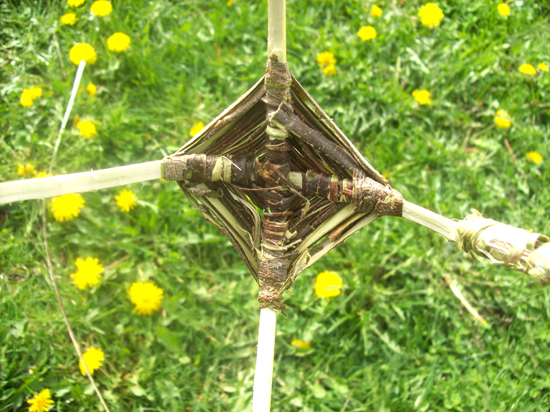
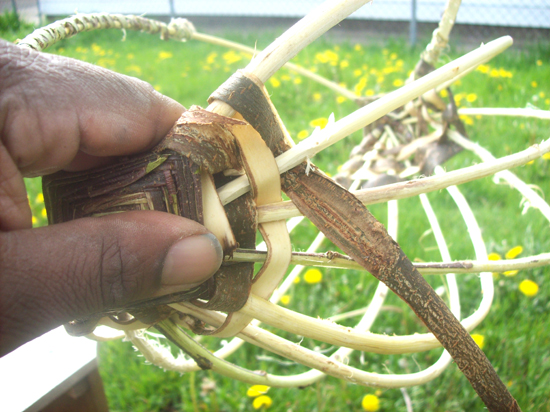
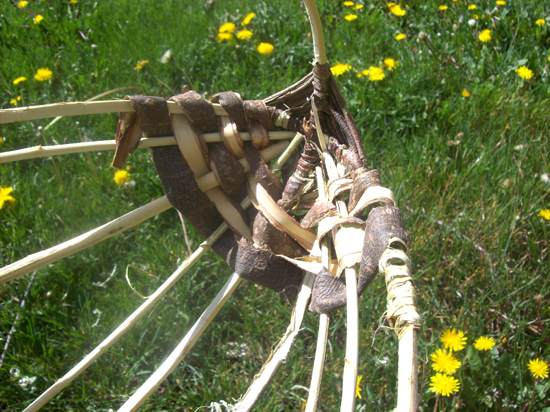
3). Start making a “God’s Eye” by over wrapping each of the four parts of the frame in turn…

ABOUTTHEIMG

4). When done the end of your basket should look like this >>

ABOUTTHEIMG

5). Repeat on the other side…

ABOUTTHEIMG

6). Next you will want to add ribs to shape your frame. Here I am using more green saplings so that they are easy to bend and shape. The ribs are inserted and rest on the insides of the God’s Eyes on either end. You may want to start with 6 saplings for ribs.

ABOUTTHEIMG

7). This is what you finished melon basket frame should look like.

ABOUTTHEIMG

8). Next strip the bark from a larger elm branch. Then place them in water to keep them moist and pliable; when elm bark dries it become hard and stiff.

ABOUTTHEIMG

9). Starting with smaller strip of elm bark start weaving it from the God’s eye pattern towards the opposite end…

ABOUTTHEIMG

10). As you weave in between the basket frame an rips the you will be locking in and strengthening the whole project.

ABOUTTHEIMG

11). Your weaving pattern should look like this with a checkerboard pattern; on a weaver run one side is the shows the outer bark and another shows the inner.

ABOUTTHEIMG

12). As you run out of the weaver you will need to splice another in. Do this by placing the new weaver under or over the remaining weaver. This is done best close to a rib so you can quickly lock it into place as you continue on.

ABOUTTHEIMG

13). Here, I am matching the sides of the weavers as I splice.

ABOUTTHEIMG

14). As you add more weavers to your basket your basket should start forming. Once I am a little along, I then will start weaving at the other end for a stretch to lock the ribs in place, then I continue from the orginal side and work my way to the opposite side, weaving as I go.

ABOUTTHEIMG

15). Here is the finished basket. Notice the handle. I added some remaining sapling bark to add a strengthening and decorative wrap.

top↟
Show more > >