Warning: file_get_contents(http://api.bit.ly/shorten?version=2.0.1&longUrl=http%3A%2F%2Fwww.theurbanabo.com%2Fhowto_2.php%3Fhid%3D63&login=studioryu&apiKey=R_8cc15499c28bbcb9125613429a5d9a0c&format=json): failed to open stream: HTTP request failed! HTTP/1.0 410 Gone in /var/www/vhosts/theurbanabo.com/includes/theurbanabo/functions.php on line 17 Warning: file_get_contents(http://api.bit.ly/shorten?version=2.0.1&longUrl=http%3A%2F%2Fwww.theurbanabo.com%2Fhowto_2.php%3Fhid%3D63&login=studioryu&apiKey=R_8cc15499c28bbcb9125613429a5d9a0c&format=json): failed to open stream: HTTP request failed! HTTP/1.0 410 Gone in /var/www/vhosts/theurbanabo.com/includes/theurbanabo/functions.php on line 17 The Urban-Aboriginal | TheUrbanAbo.com ~ Primitive Technology & Aboriginal Living Skills Study & Practice

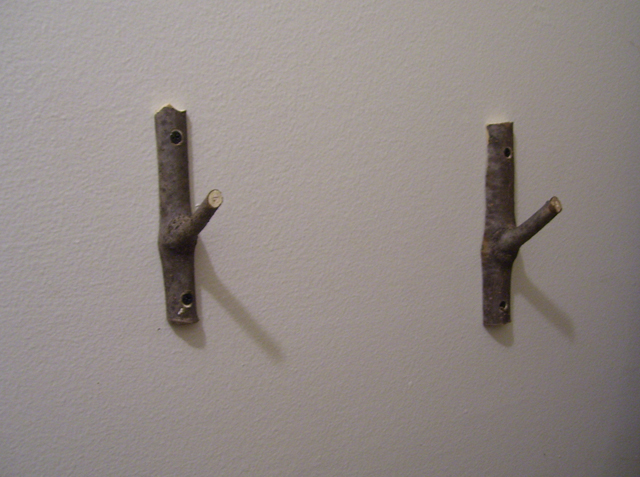
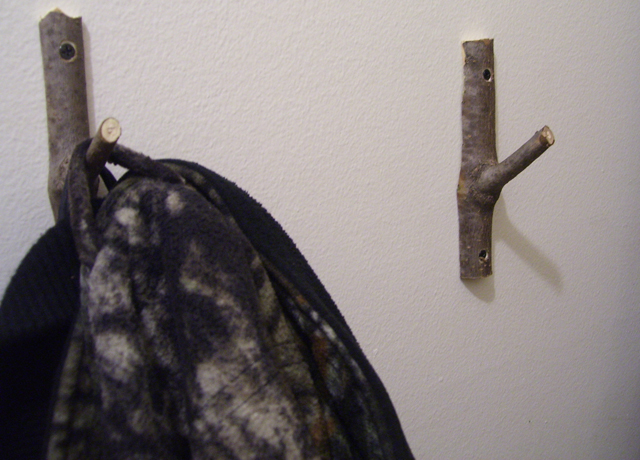
How to: Make a Branch Hook

Category: Shelter / Difficulty Level: 1
Posted: 2013-03-29 14:57:32
6241 view(s)

This is a cool rustic way to hang things, and a great way to make use of outside Spring-cleaning brambles from bush or tree-pruning and refuse...if painted/varnished, carved, or otherwise decorated this would make a cool and unique gift idea.

Inspired by The Art of Manliness article, "How to Make a Coat Hook from a Tree Branch"...this is The Urban-Abo version. ;)


Citation:
http://www.artofmanliness.com/2013/01/29/how-to-make-a-coat-hook-from-a-tree-branch/

Instructions

ABOUTTHEIMG

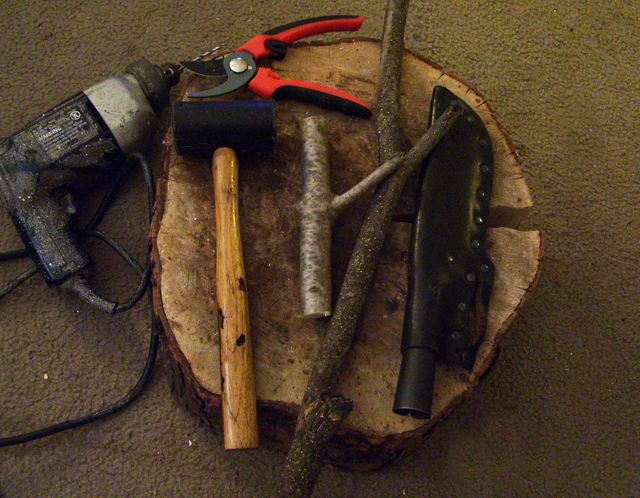
1). You will need the following:

ABOUTTHEIMG

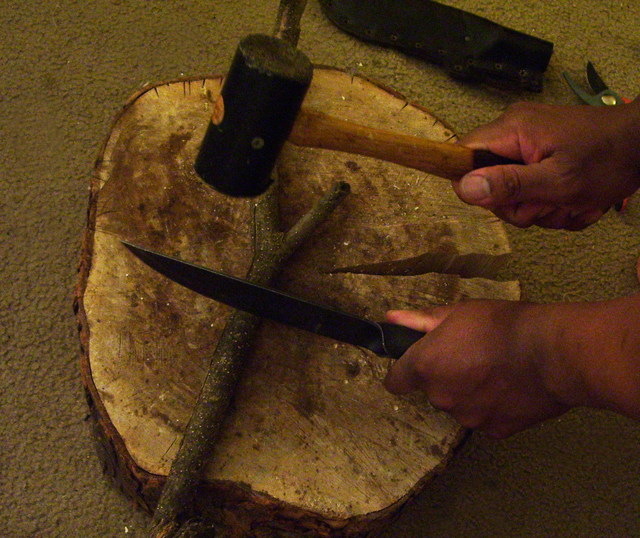
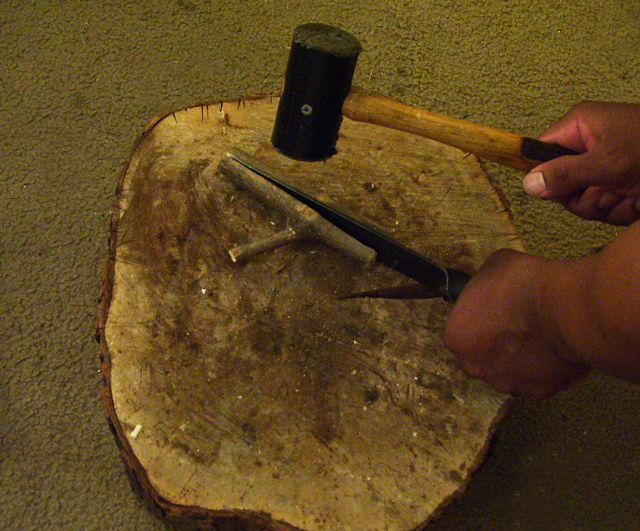
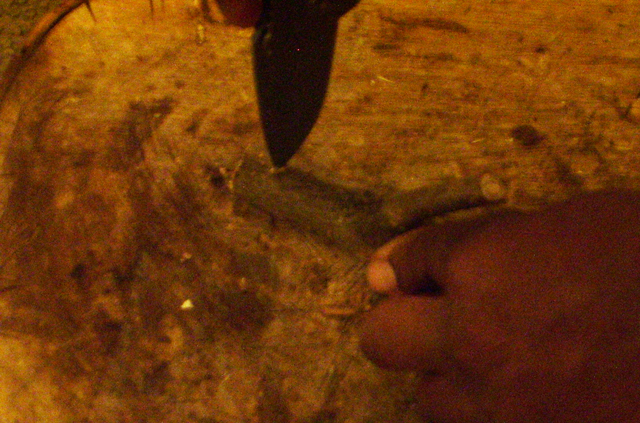
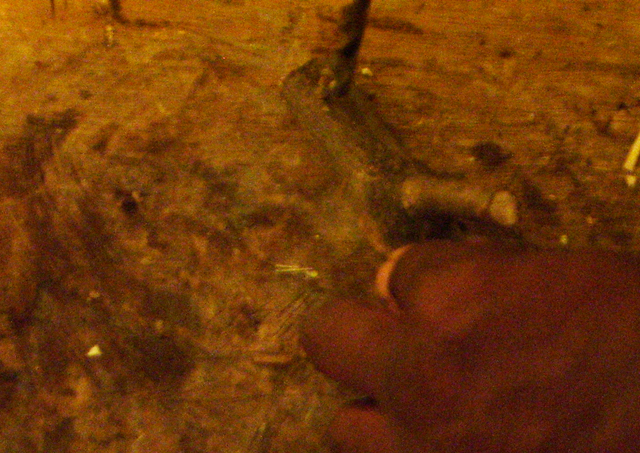
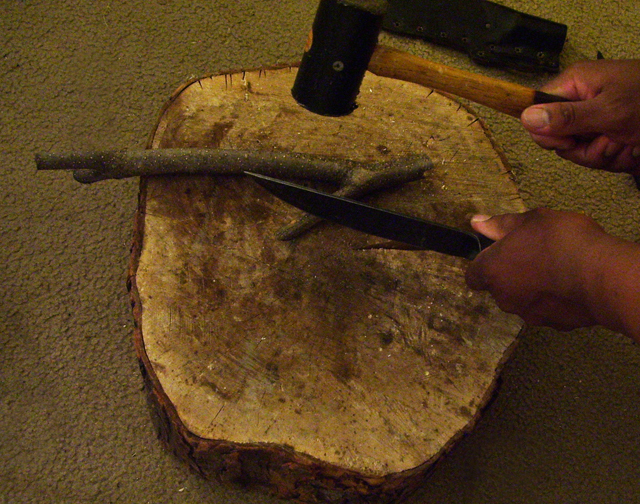
2). With cutting tool cut at least 1" from the top of the (smaller) hooking branch. Notice how the hammering tool is used to control the cut. Of course a saw can be used, this is a technique that works pretty well with out "modern" tools

ABOUTTHEIMG

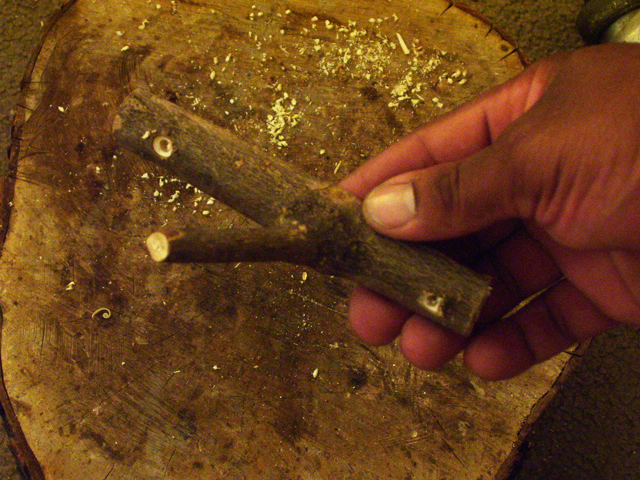
3). Trim the hooking branch if desired...

ABOUTTHEIMG

4). Now cut at least 1" from the base of the hooking branch...

ABOUTTHEIMG

5). Now split the base trimmed branch perpendicular to the hooking branch.

ABOUTTHEIMG

6). You now have the basic branch hook, almost done.

ABOUTTHEIMG

7). Here, I am taking my cutting tool and twisting a start-hole.

ABOUTTHEIMG

8). With my drilling tool, here a modern electric drill, I start a fairly large hole; at least one that is larger than the head of the screws I intend to use...DO NOT drill all the way to the other side of the branch!

ABOUTTHEIMG

9). Switch out drill bits to a smaller size, and drill all the way to the other side of the branch in the larger started hole. The purpose of using two differnent sized bits is creating a counter-sink to allow the screw head to sit flush or sunken in the branch.

ABOUTTHEIMG

10). Voila! Your branch hook is now ready to mount on to your wall.

ABOUTTHEIMG

11). Using your drilling tool or a screwdriver you can mount your new rustic-style branch hook.

ABOUTTHEIMG

12). Give it a test run with whatever you wish to hang. Of course the branch can be stained/painted, varnished and even carved into with or without bark to match your style or taste. Have fun! :)

top↟
Show more > >